User-Interface
CineMon’s UI is purposely minimalistic and designed to let the image take center stage. Yet every tool and monitoring function lives no more than a single tap/click/key-press away. The interface can also be customized to adapt to personal preferences, workflows, and use cases.
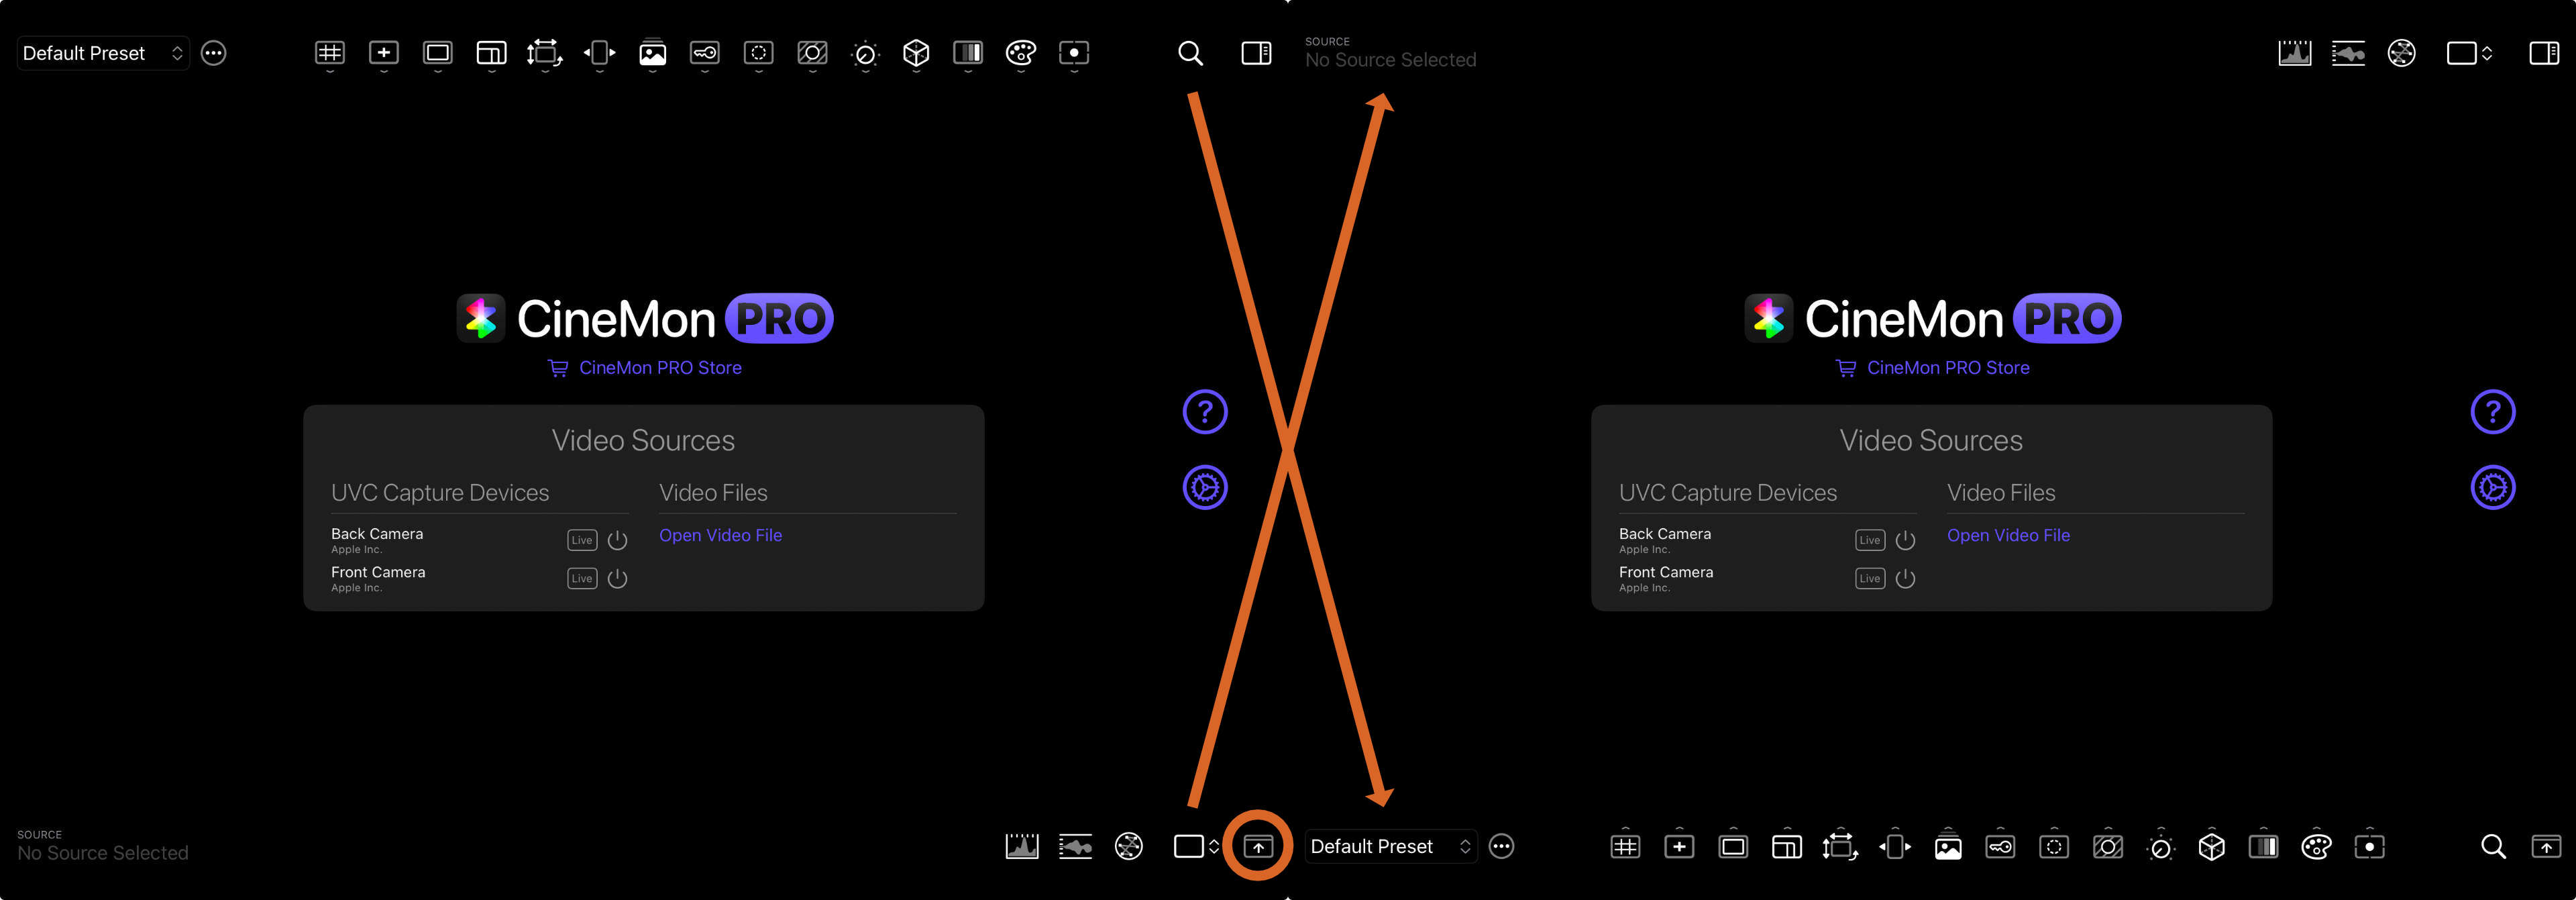
CineMon’s main window is divided into three main areas: the Top Toolbar, the Main Display Area, and the Bottom Toolbar. Each area is composed of one or more regions that group related functions.
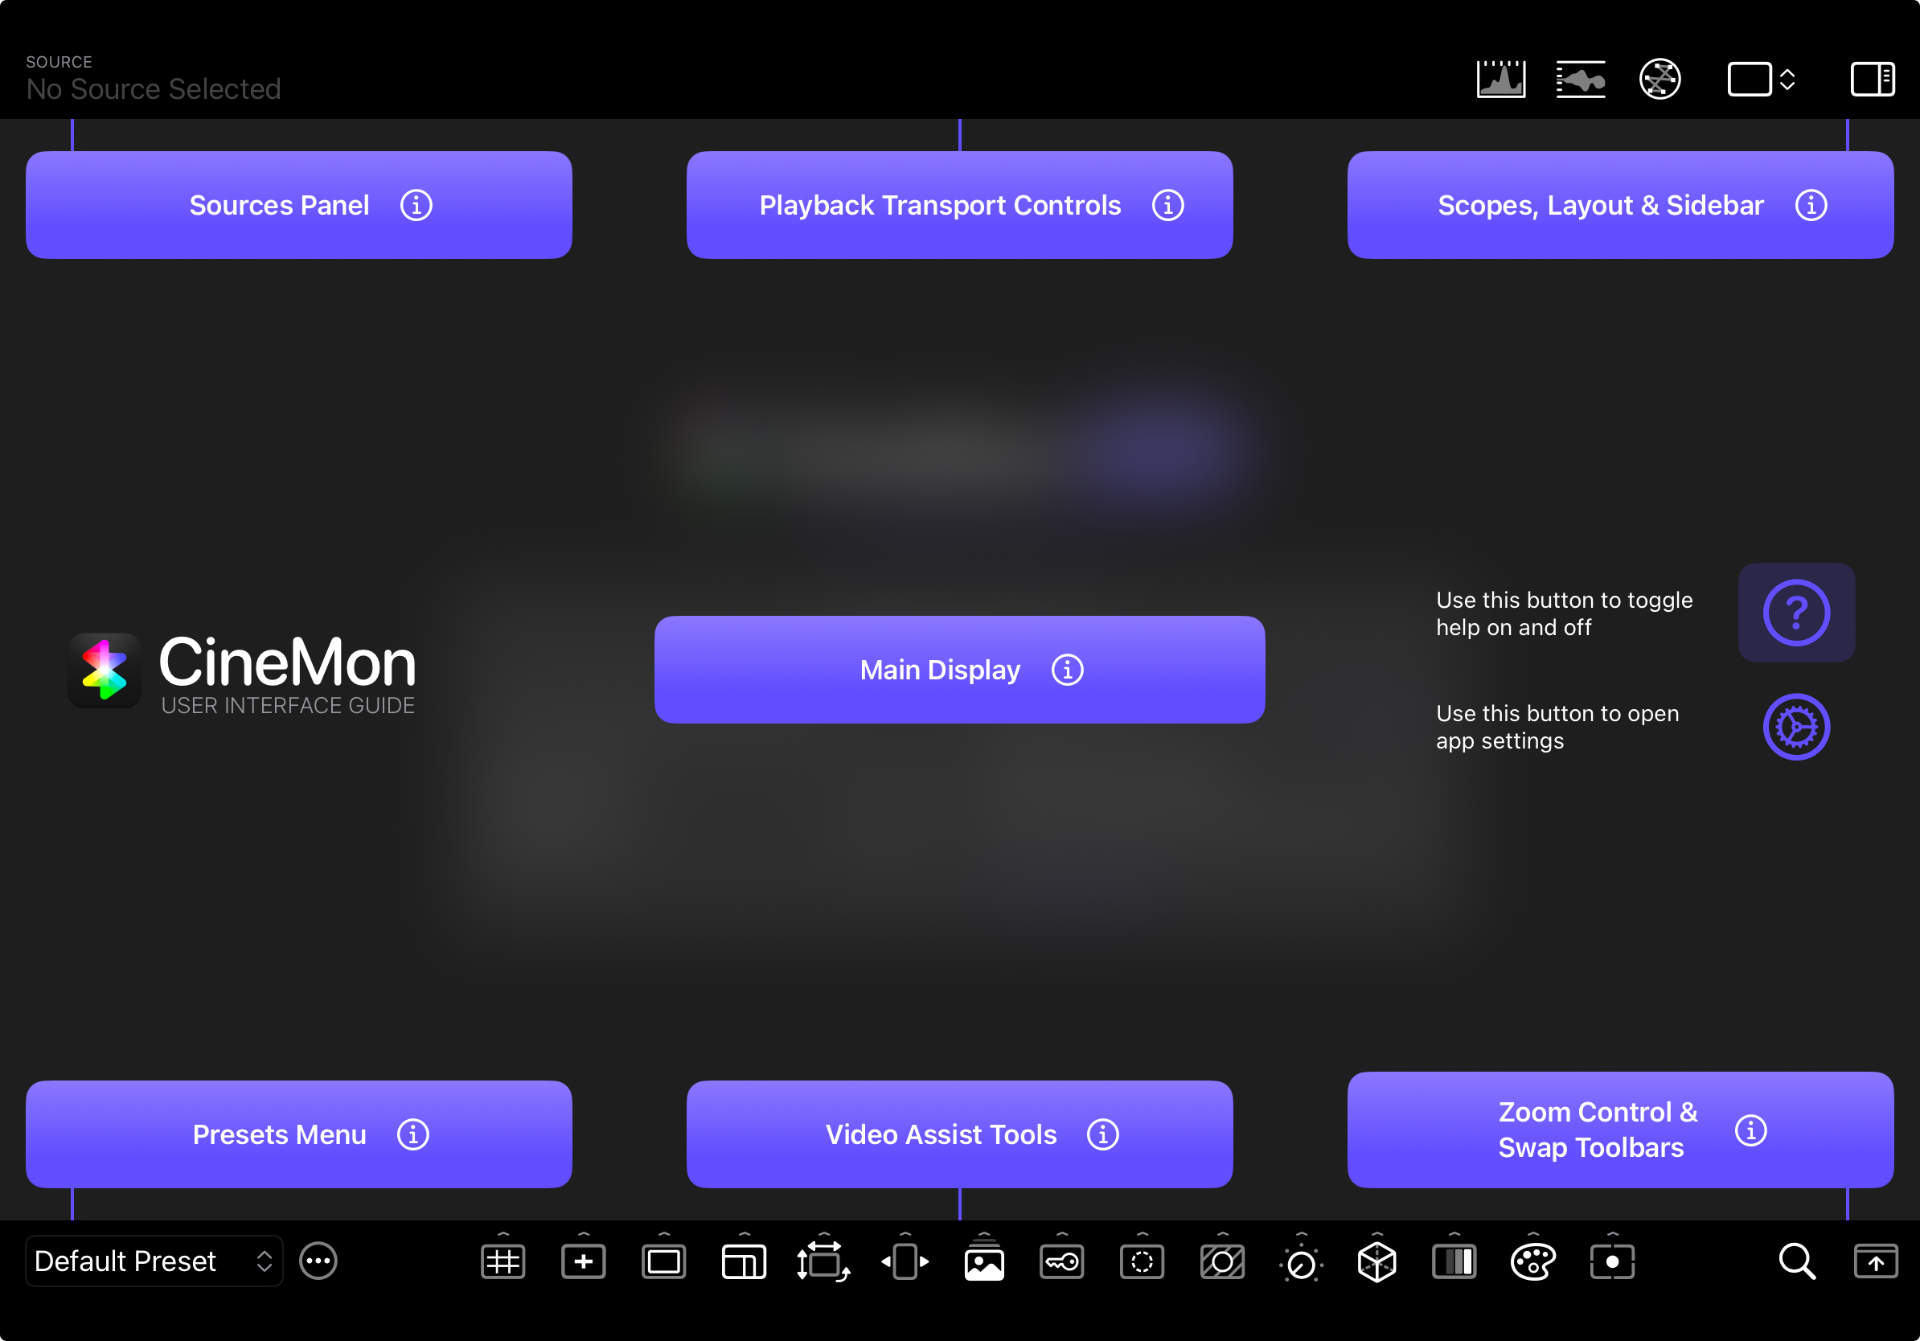
On first run, or whenever there is no active video source, the Main Display Area shows the Home Screen.
From the app’s Main Display Area, you can show a general UI overview by tapping/clicking the question mark (?) button on the right side (only visible when no source is active). With the Help overlay active, Tap/Click the information (i) button for each region to reveal additional details.
When a video source is active, the Main Display Area shows one or more Image Viewers depending on the active Layout.
You can double-tap/-click on any viewer to hide the toolbars. The Main Display Area will expand to cover the whole window. Double-tap/click again to bring the toolbars back.
This section walks you through each area and region of the interface in detail.
Main Display Area
Home Screen
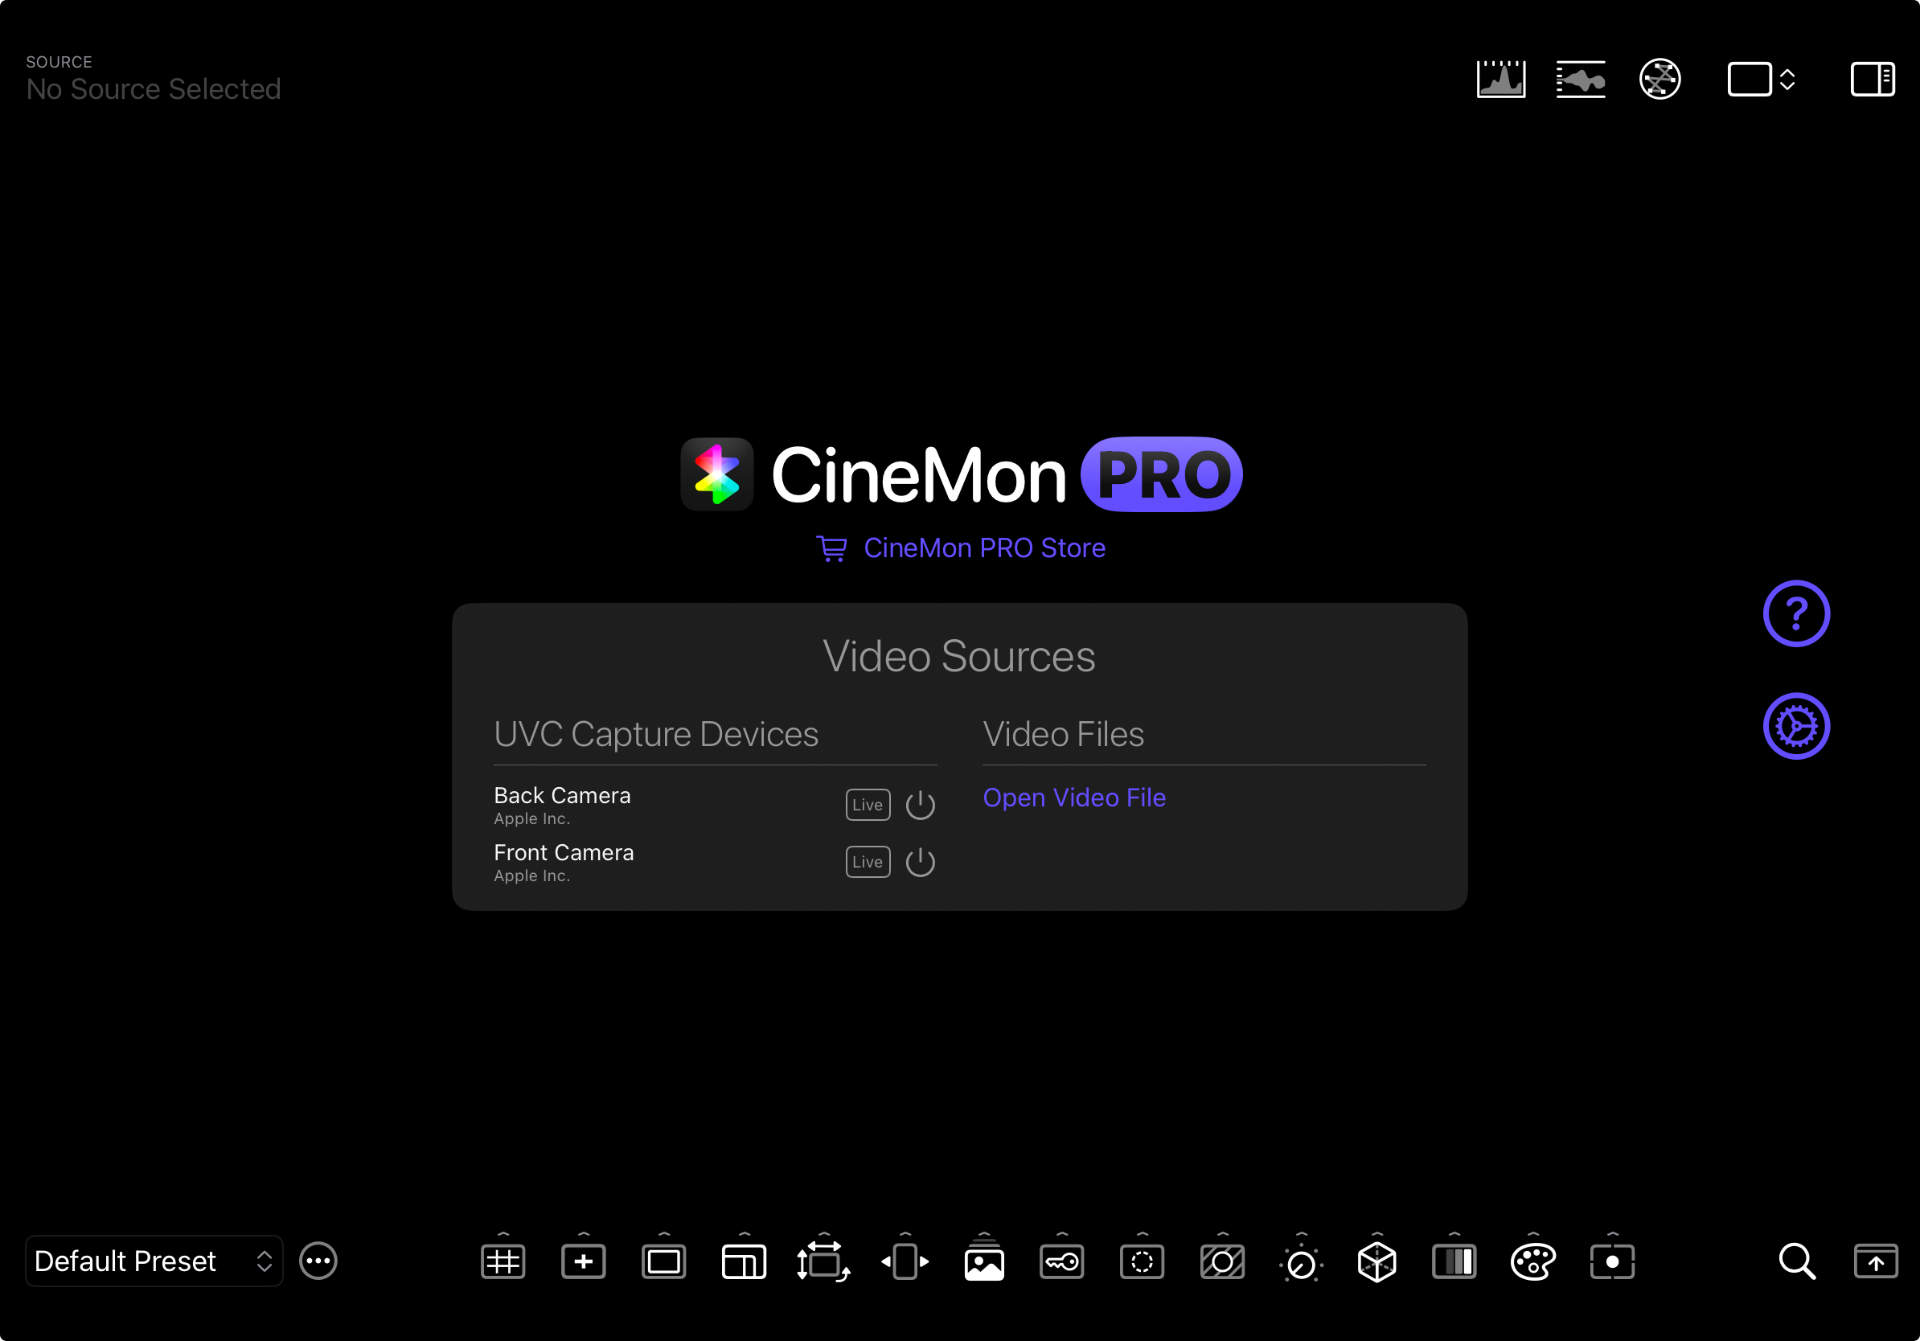
Whenever there is no active video source, the Main Display Area shows the Home Screen, which contains a Sources Panel and a link to the CineMon Store. To the right of the Sources Panel you’ll find a help button (?). On iPad, you will also find a button to open the App Settings.
Sources Panel
The Sources Panel shows all available input sources. The left column lists all live input sources. The right column lists all recently opened files and a button to open a new file for playback.
To start monitoring a source, click on its corresponding power button ⏻ or on the source name. The Home Screen will be replaced by a Viewer for the active source.
Viewer
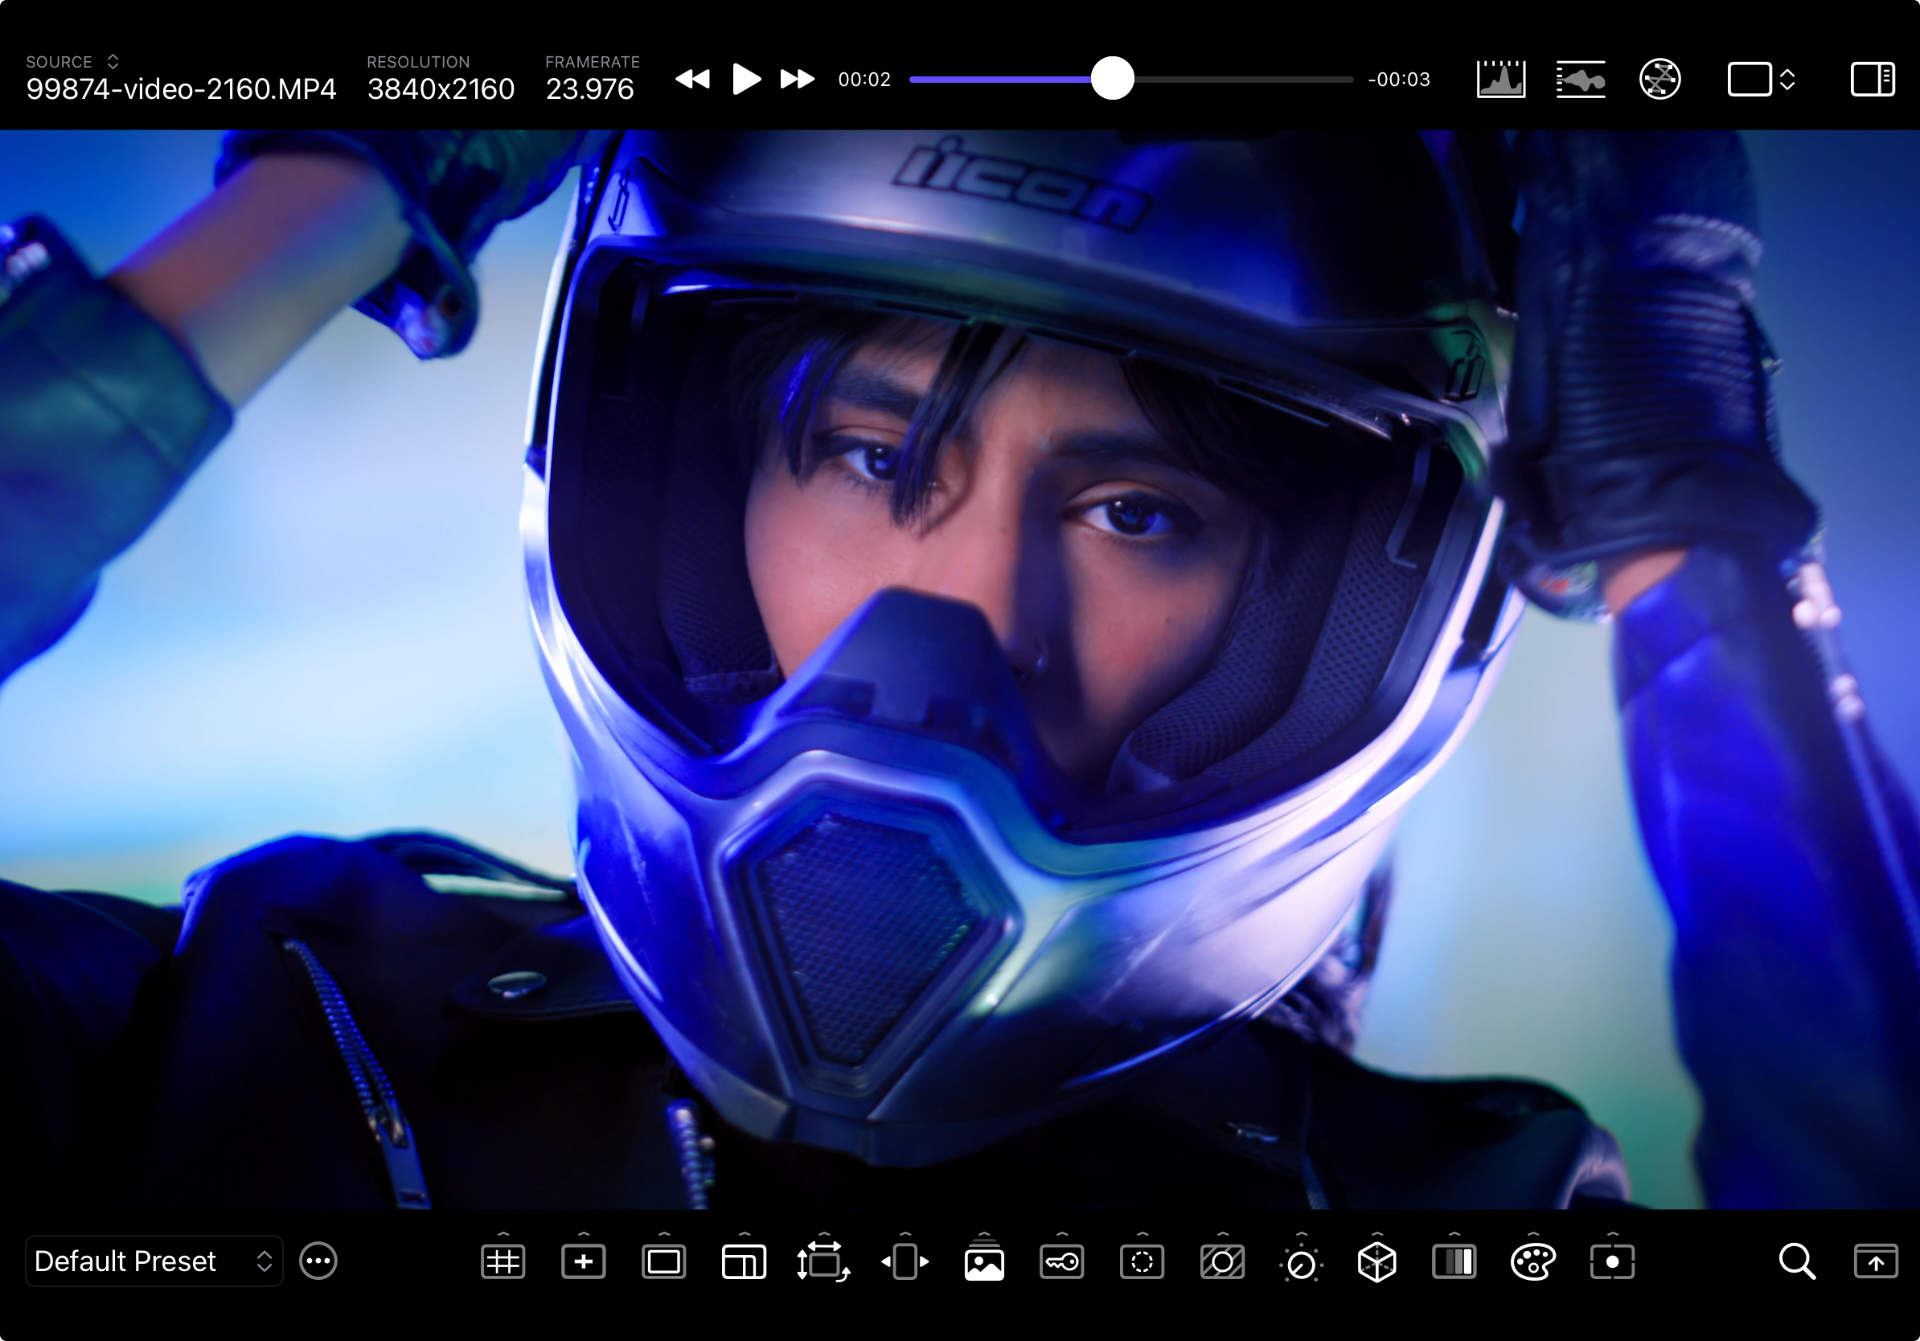
By default, CineMon displays a single image viewer that renders all video assist overlays and effects directly on the source image.
Zoom Control
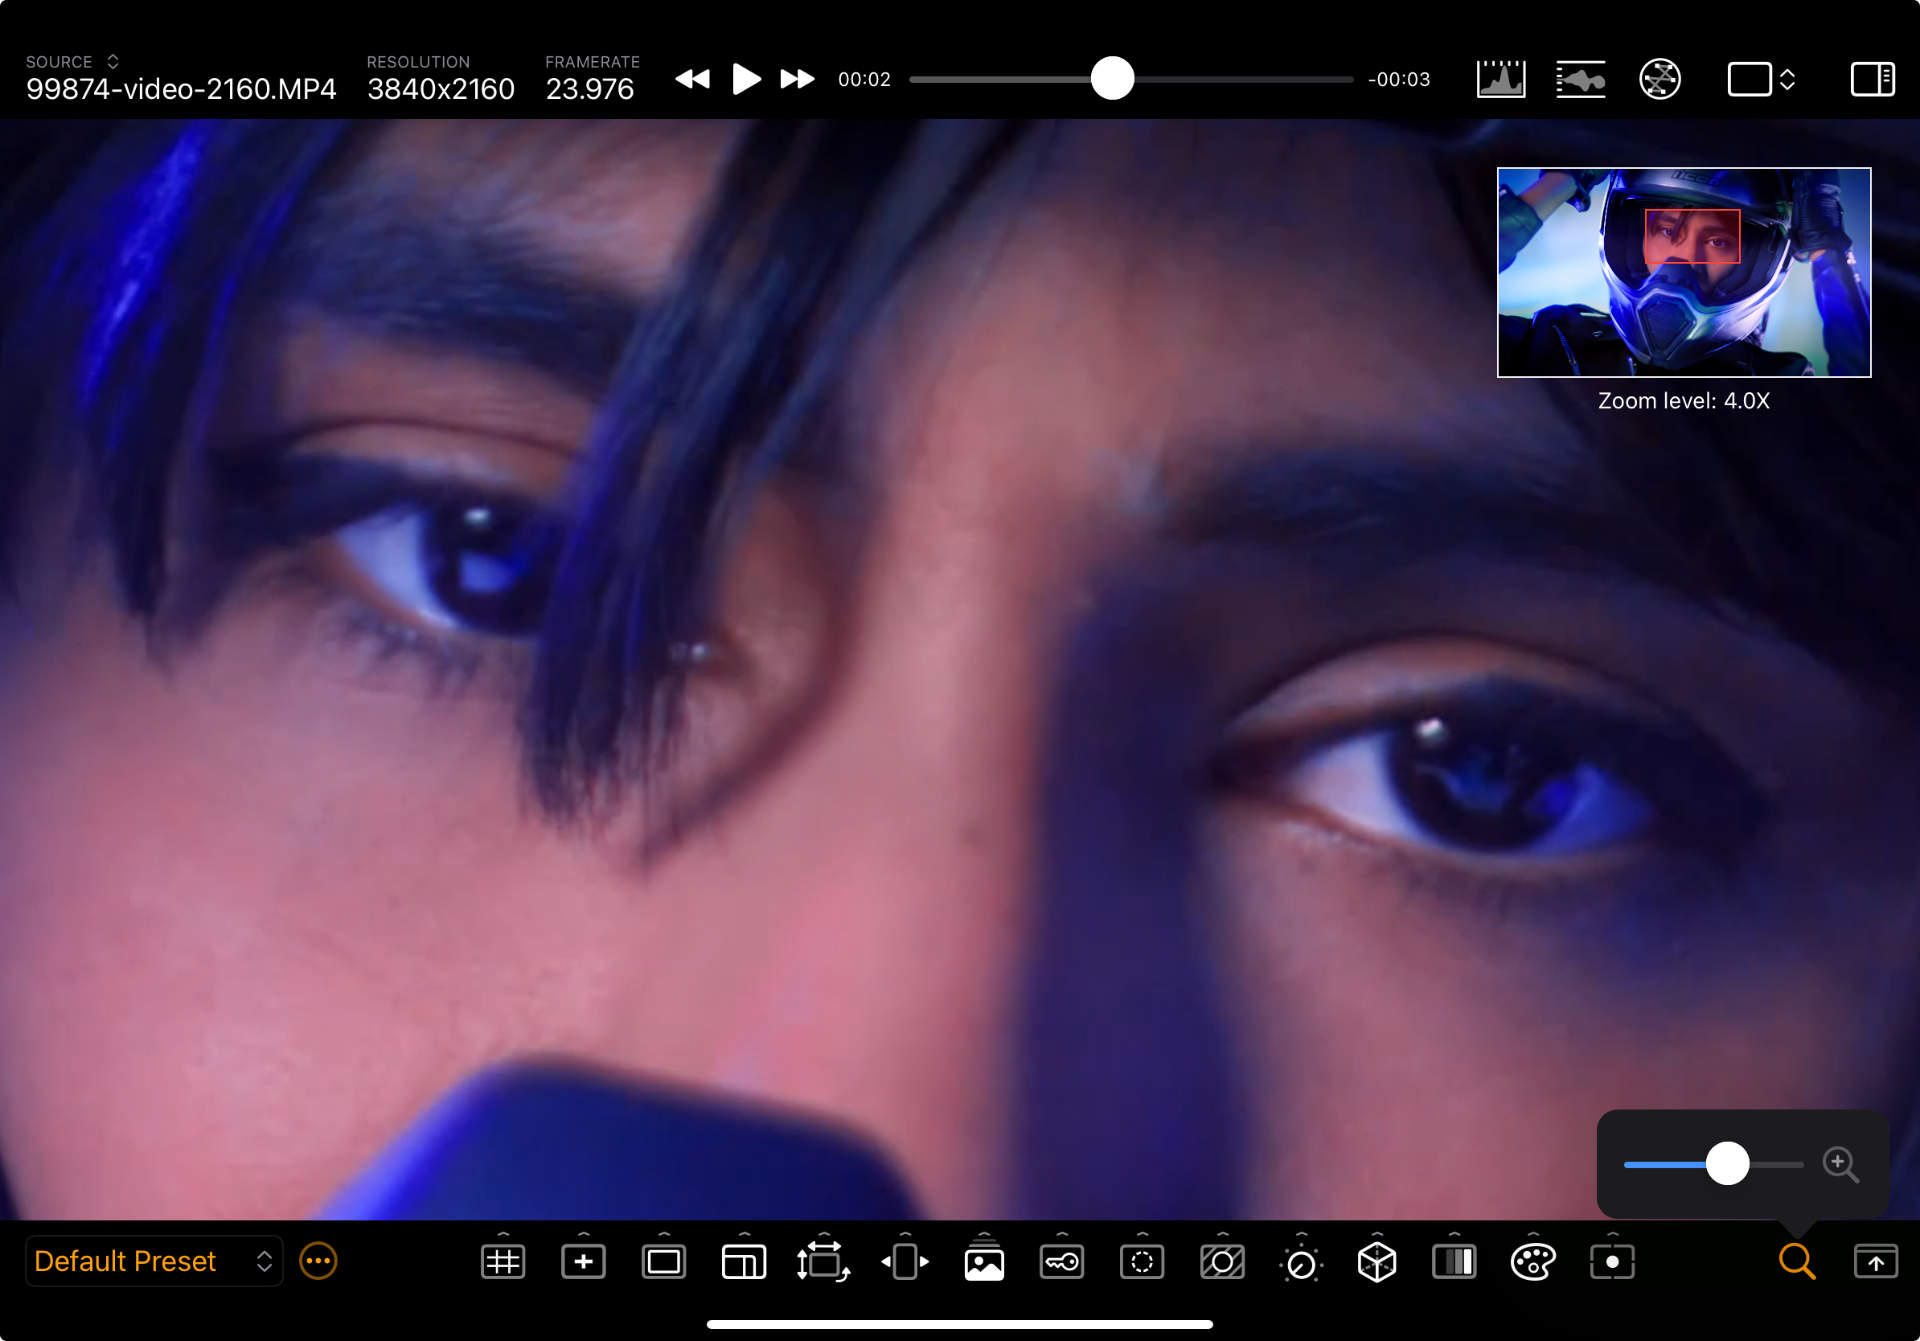
You can magnify the image by using a pinch-to-zoom gesture on the image itself, or by using the Zoom Control (🔍) on the Video Assist Toolbar.
When zoomed in, a mini-map appears and a red rectangle indicates the portion of the image that is currently visible in the viewer. You can navigate to other areas of the image by dragging the image itself, or by dragging the red rectangle in the mini-map. Zoom all the way out to turn off the mini-map.
Specialized Viewers
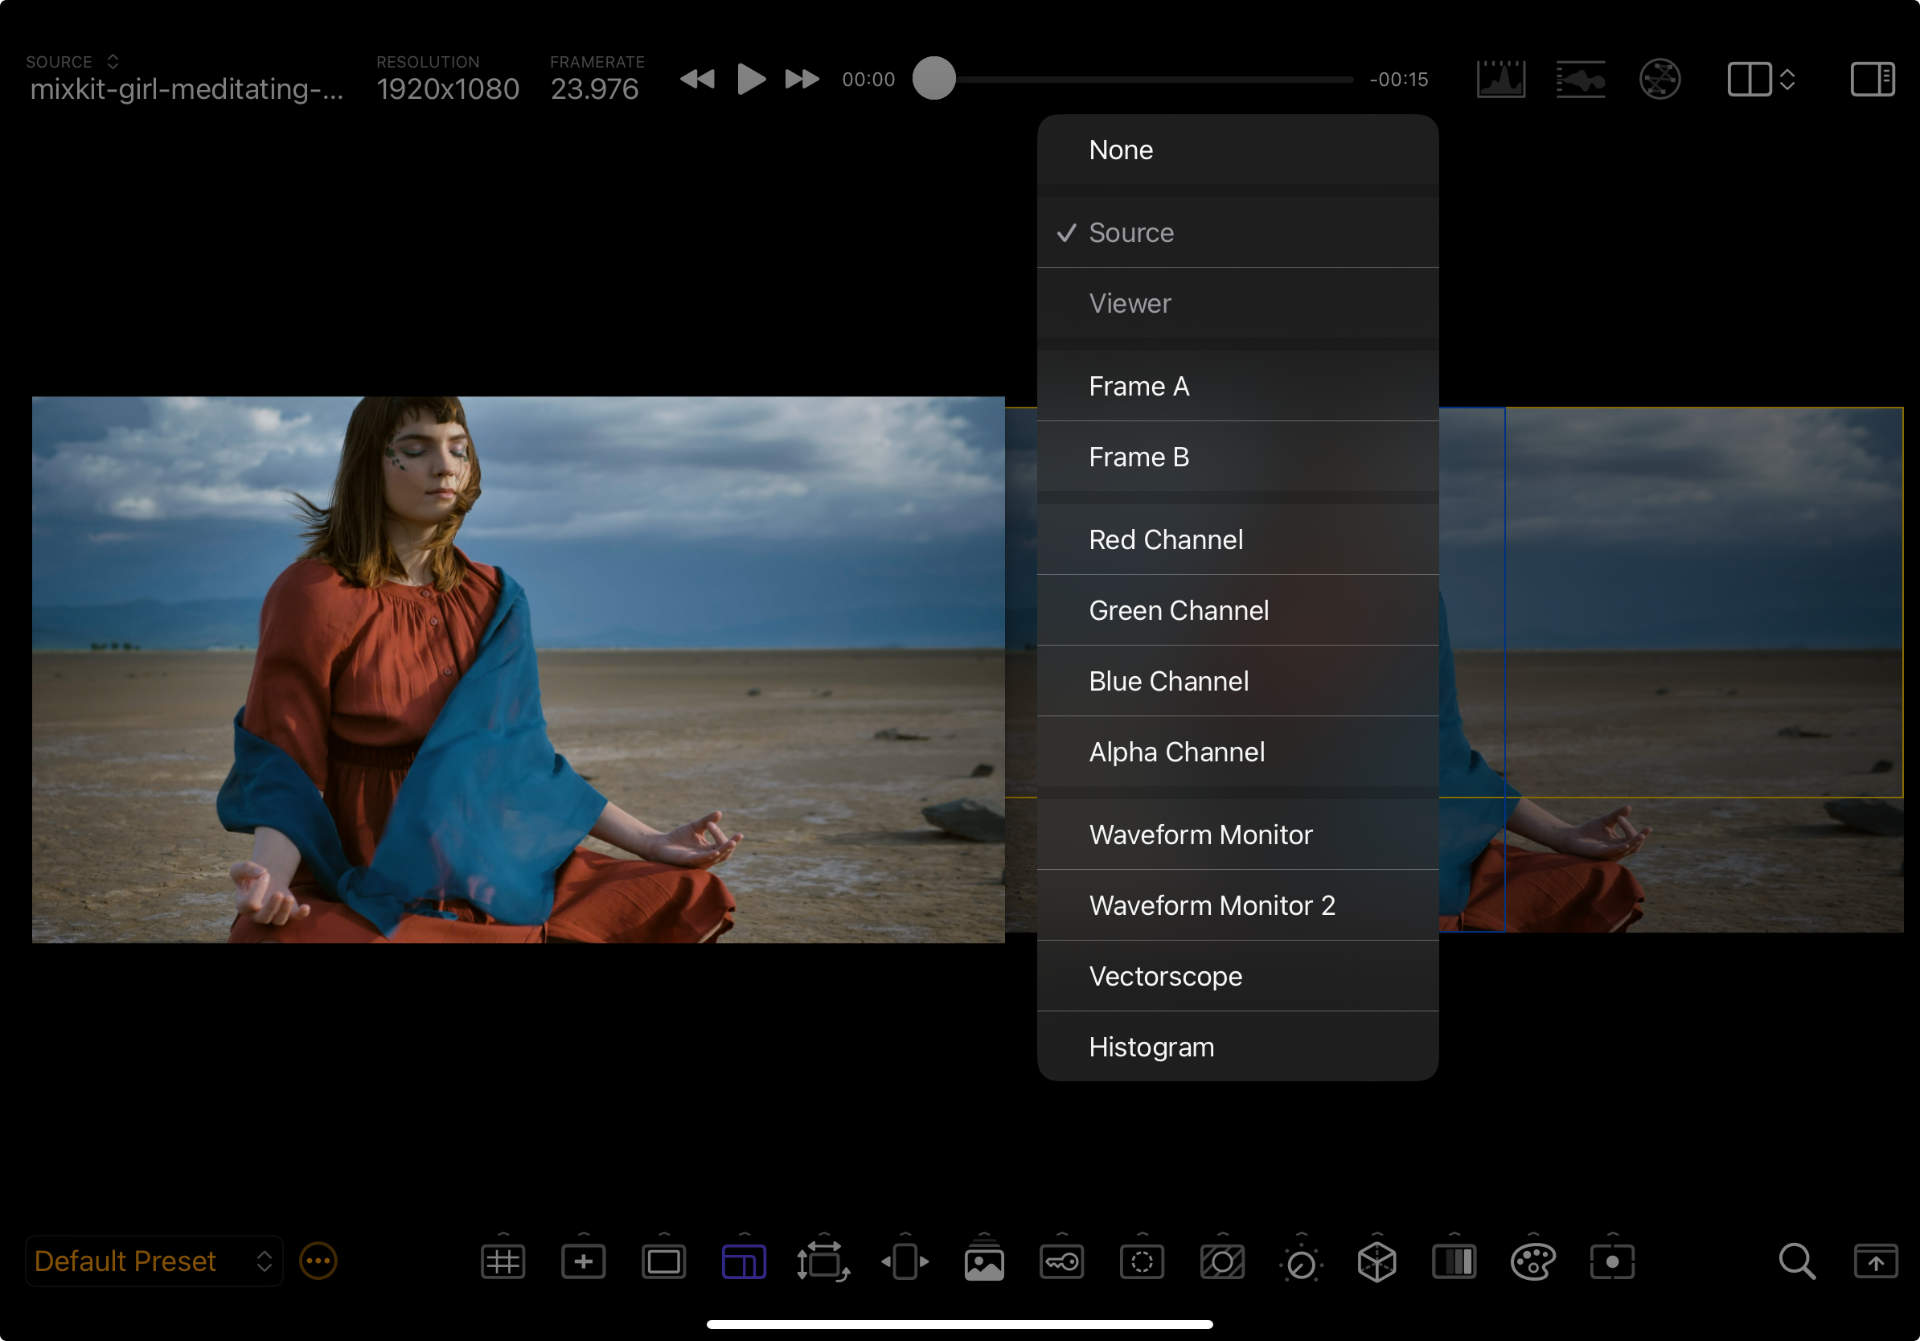
CineMon also includes other types of specialized viewers with specific monitoring functions. To change the active viewer type iPad Long Press Mac Right-click on the viewer to bring up a context menu with all available viewers.
| Viewer Type | Displays |
|---|---|
| Source | The original image source, without any processing applied. |
| Monitor/Viewer (Default) | The processed image, including all guides, color adjustments, effects, and assist widgets. |
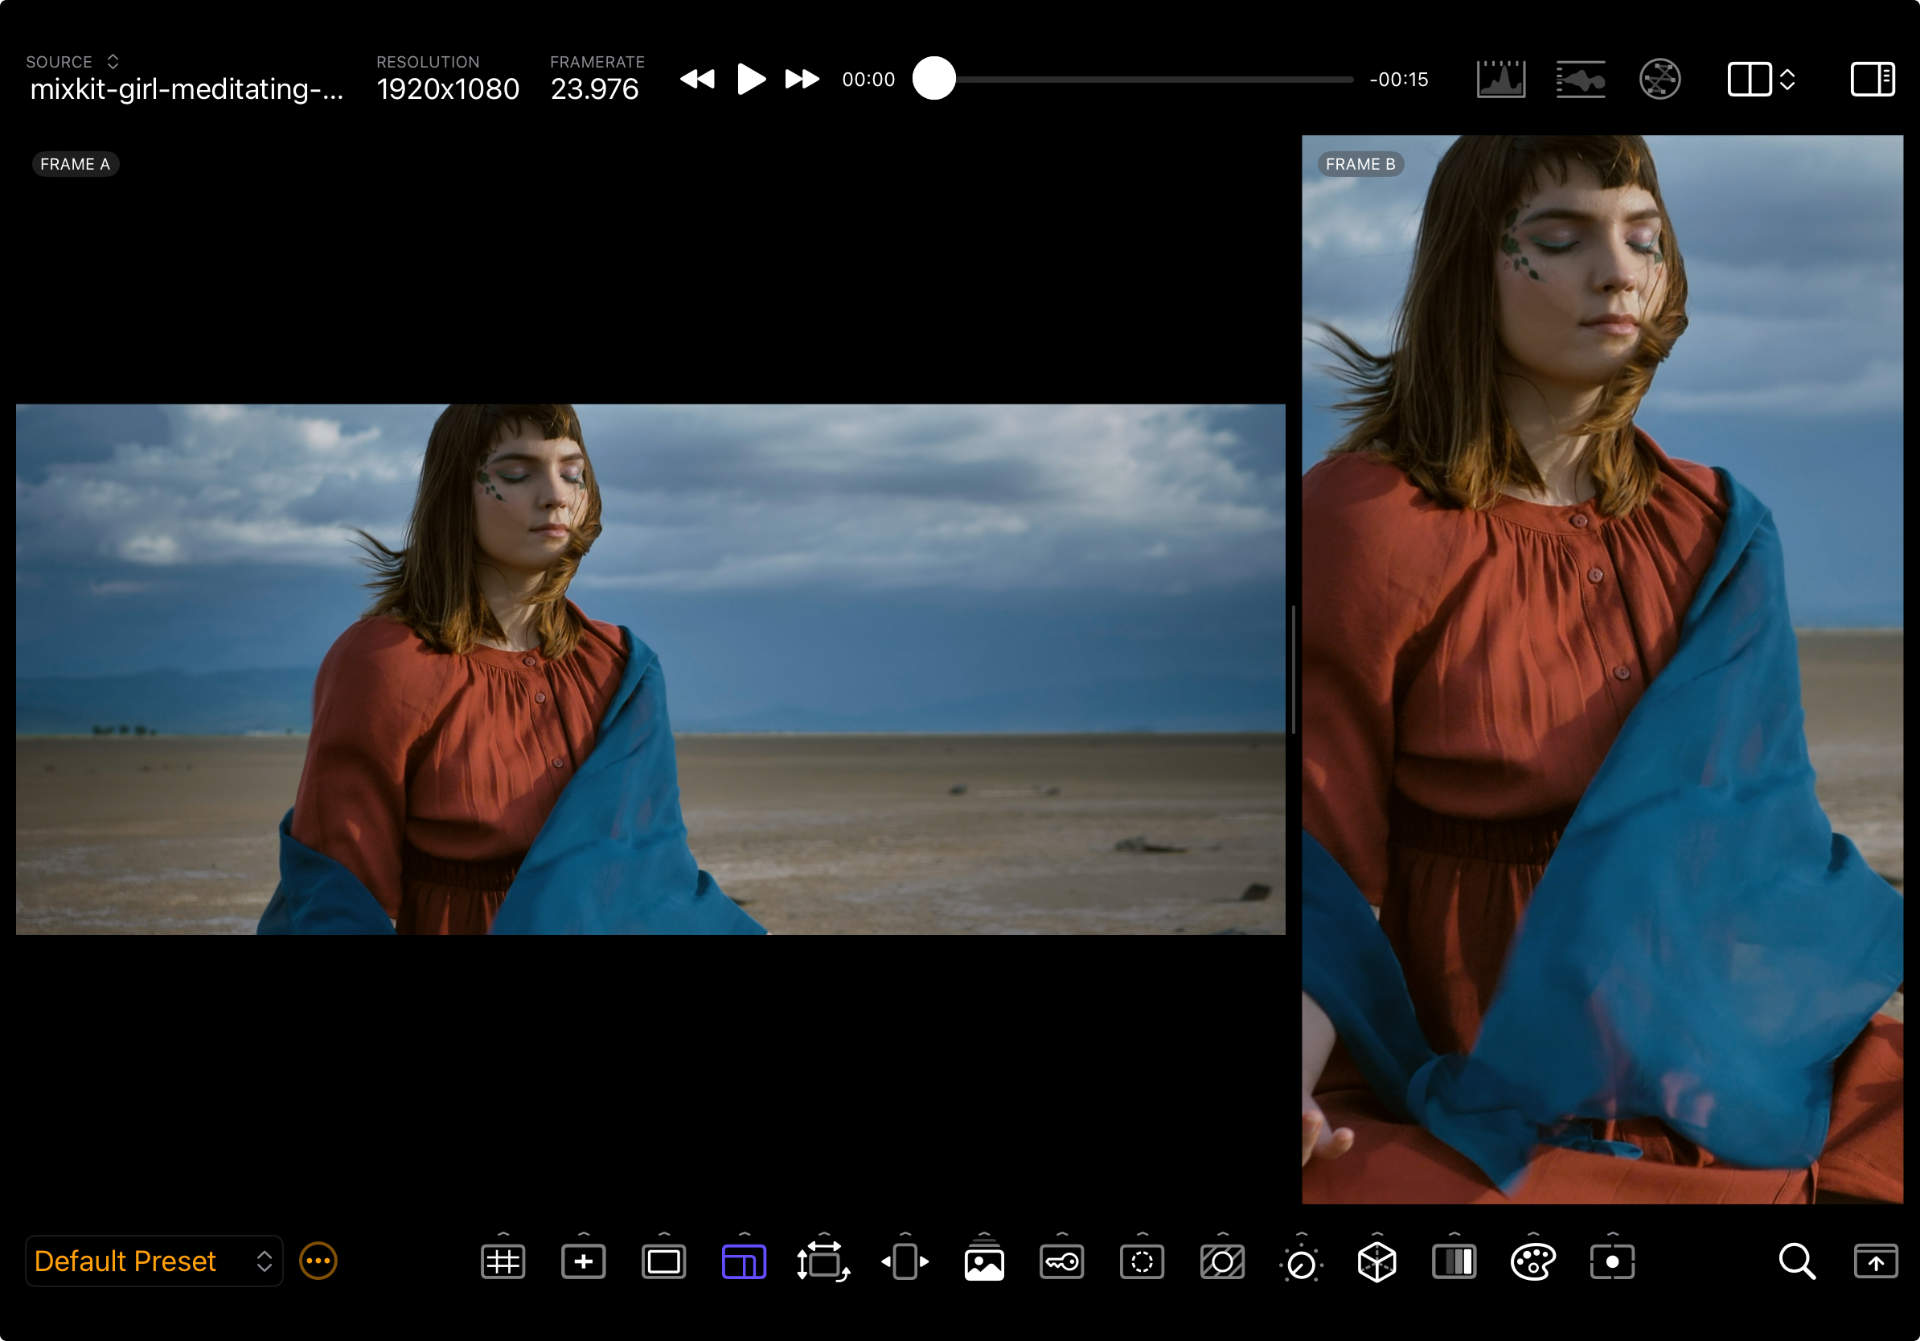
| Frame A | A cropped version of the source image based on the A framing guide. |
| Frame B | A cropped version of the source image based on the B framing guide. |
| Red Channel | A grayscale image representing the values of the Red Channel from the RGBA source. |
| Green Channel | A grayscale image representing the values of the Green Channel from the RGBA source. |
| Blue Channel | A grayscale image representing the values of the Blue Channel from the RGBA source. |
| Alpha Channel | A grayscale image representing the values of the Alpha Channel from the RGBA source. |
| Waveform Monitor | A Waveform Monitor. |
| Waveform Monitor 2 | A secondary Waveform Monitor which can be configured independently from the first. |
| Vectorscope | A Vectorscope. |
| Histogram | A Histogram. |
Layout System
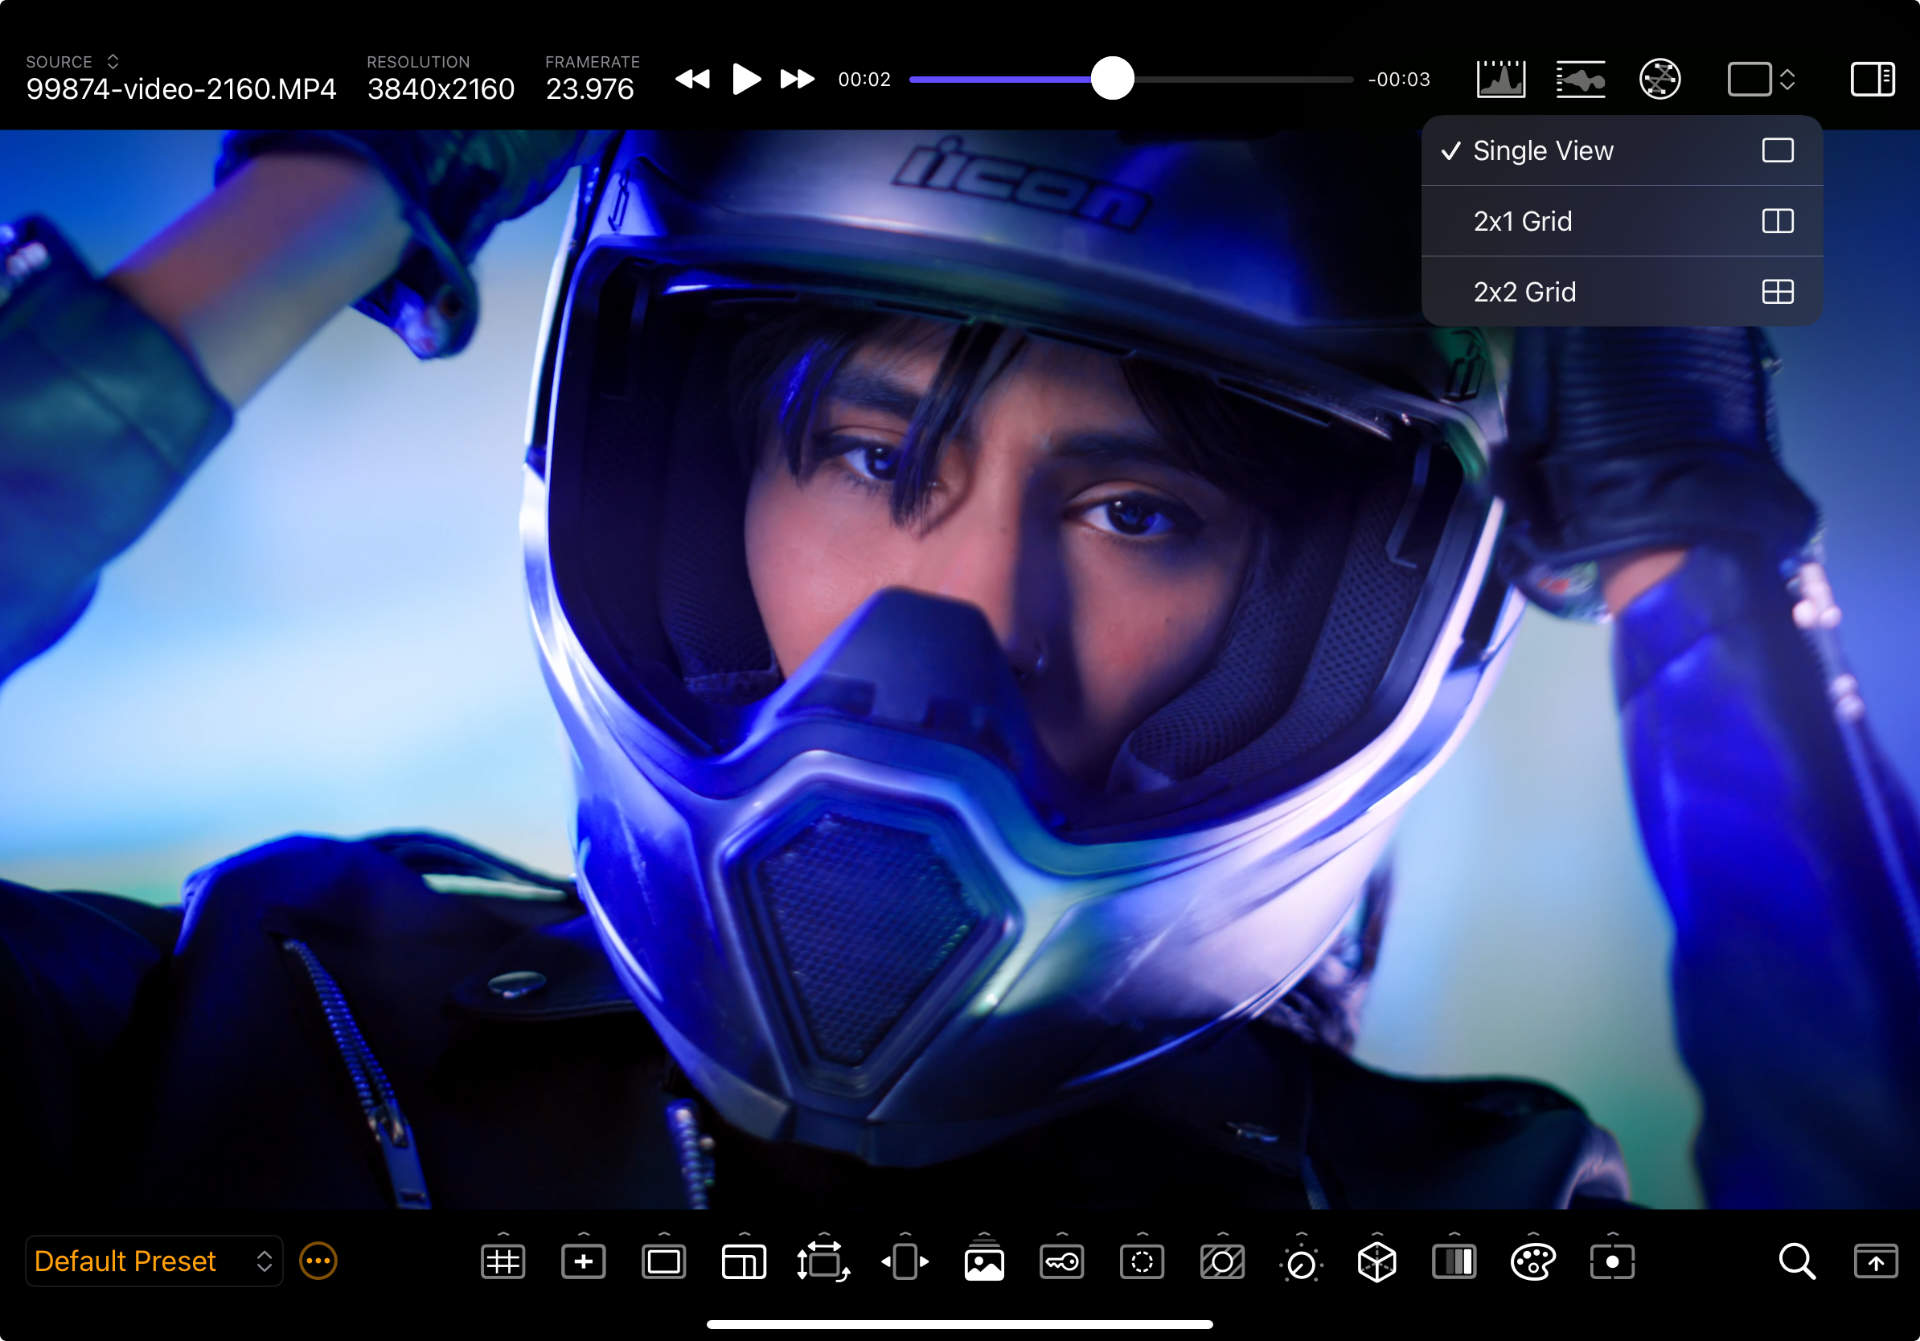
The Main Display Area displays a single viewer by default, but CineMon PRO supports multi-view layouts, which can host multiple viewers simultaneously, in different Panels. To change the display layout, use the Display Layout menu on the Status Toolbar.
| Layout | Displays |
|---|---|
| Single View (Default) | One viewer at a time. |
| 1x2 Grid | Two viewers, arranged one over the other, vertically (a.k.a. top-bottom). |
| 2x1 Grid | Two viewers, arranged side by side, horizontally (a.k.a. side-by-side). |
| 2x2 Grid | Four Viewers, arranged in a grid with two columns and two rows. |
The size of the panels in multi-view layouts can be changed by dragging the divider between the panels.
2x1 Grid
2x2 Grid
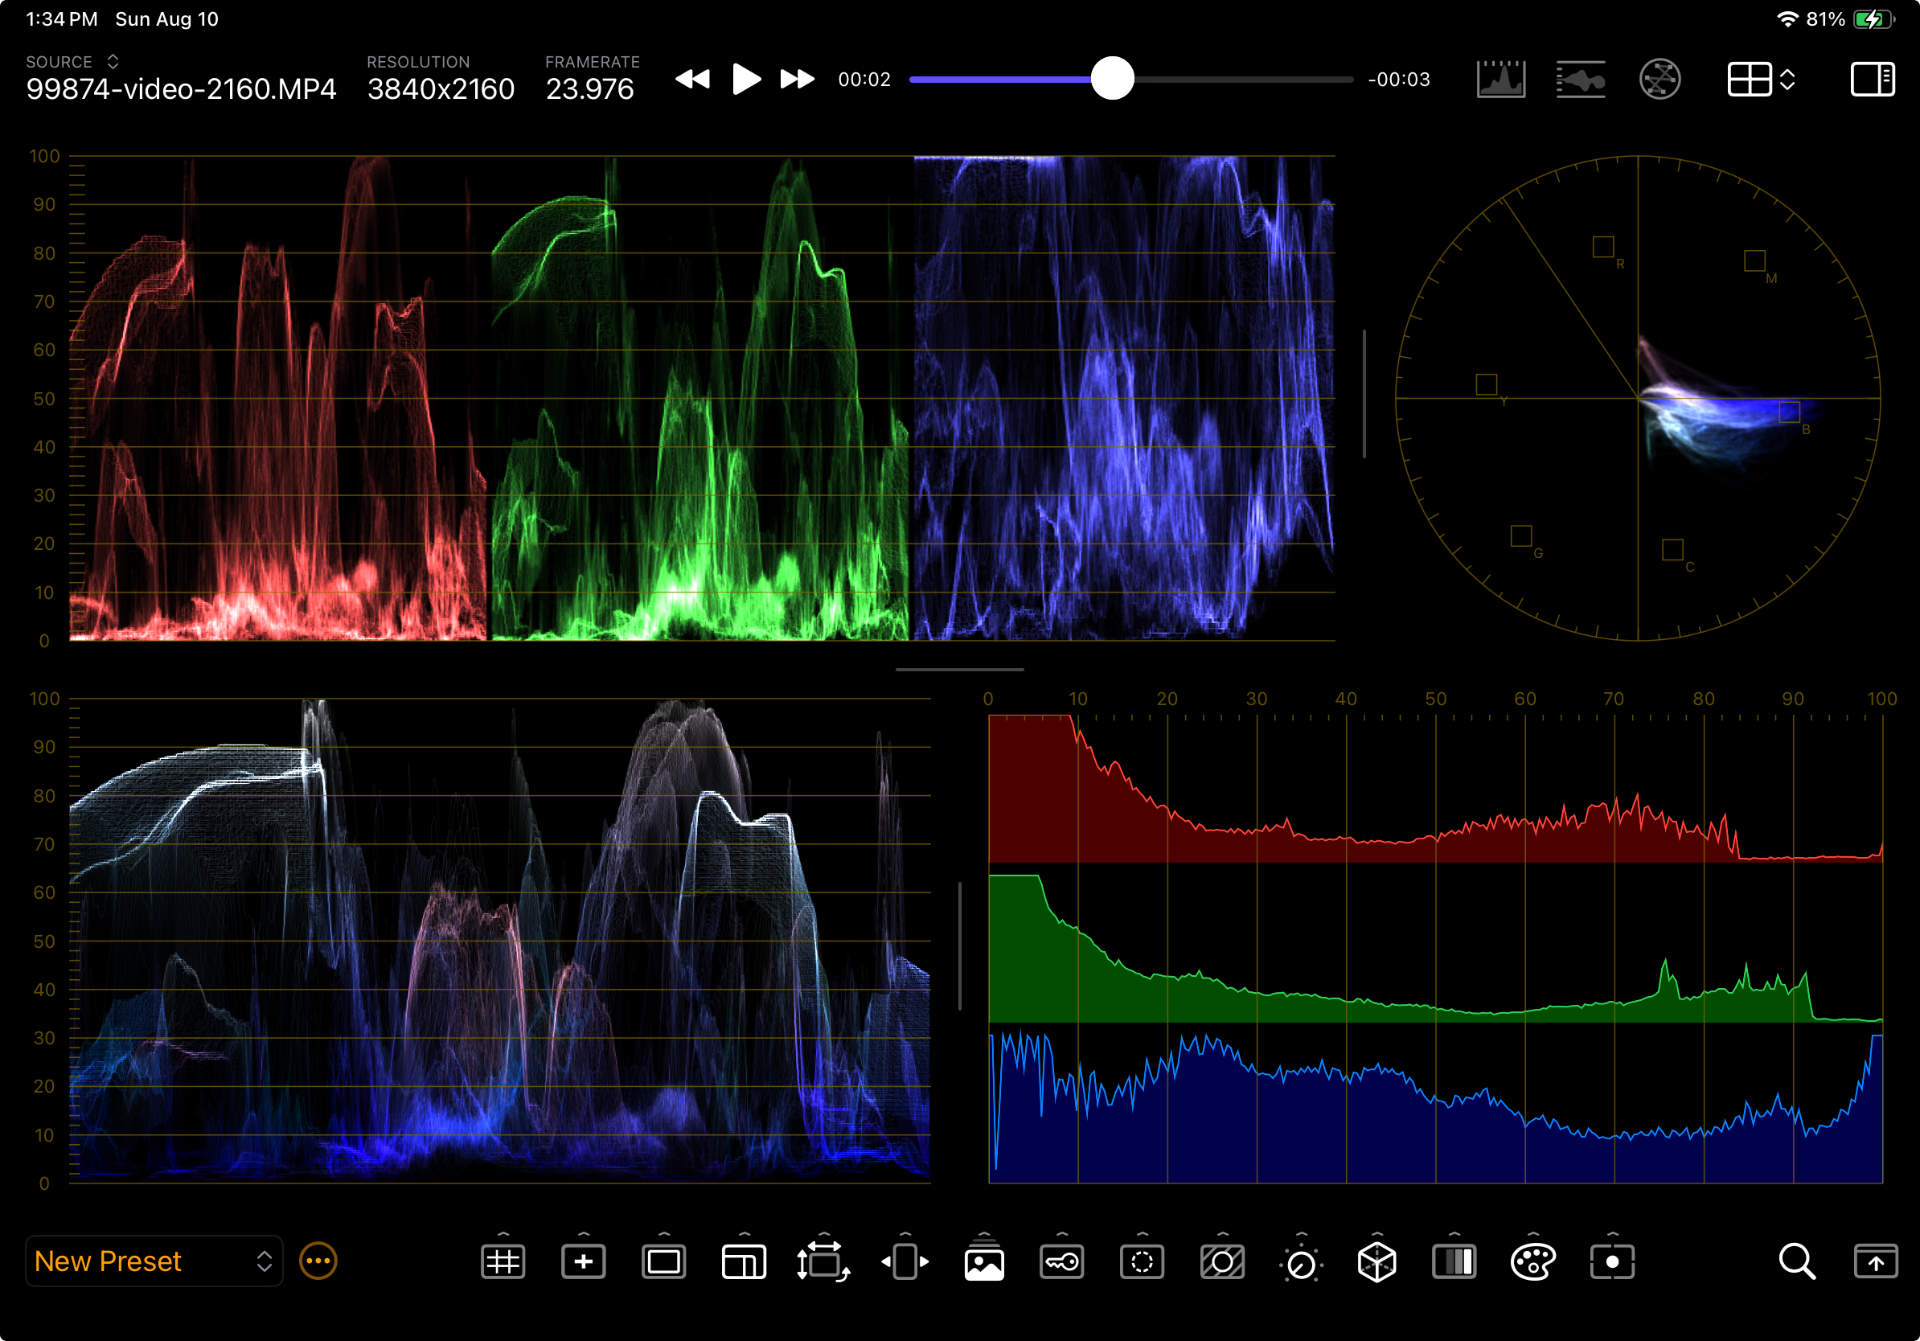
Floating Scopes
The video scopes can also be displayed in windows that float above the monitor viewer. Tap/Click on any of the video scope buttons on the Status Toolbar to bring up the corresponding scope window. Use a Pinch-to-zoom gesture to resize the scope window. Drag the window to reposition. Double-tap/click to open that scope’s settings bar.

For more information on each scope and their settings check out the reference pages for the Waveform Monitor, Vectorscope, and Histogram.
Toolbars
CineMon has two main toolbars: the Assist Toolbar and the Status Toolbar. One is shown at the top and one at the bottom. Their positions can be swapped according to your preferences using the Swap Toolbars button on the lower right of the bottom toolbar.
Assist Toolbar
| Region | Location | Purpose |
|---|---|---|
| Presets Menu | Left | With CineMon PRO you can quickly switch presets by selecting them from this menu. Use the Preset Actions Menu (…) to save, rename, duplicate, and delete presets. When CineMon PRO is not available the Presets menu is replaced by a button that opens the CineMon Store. |
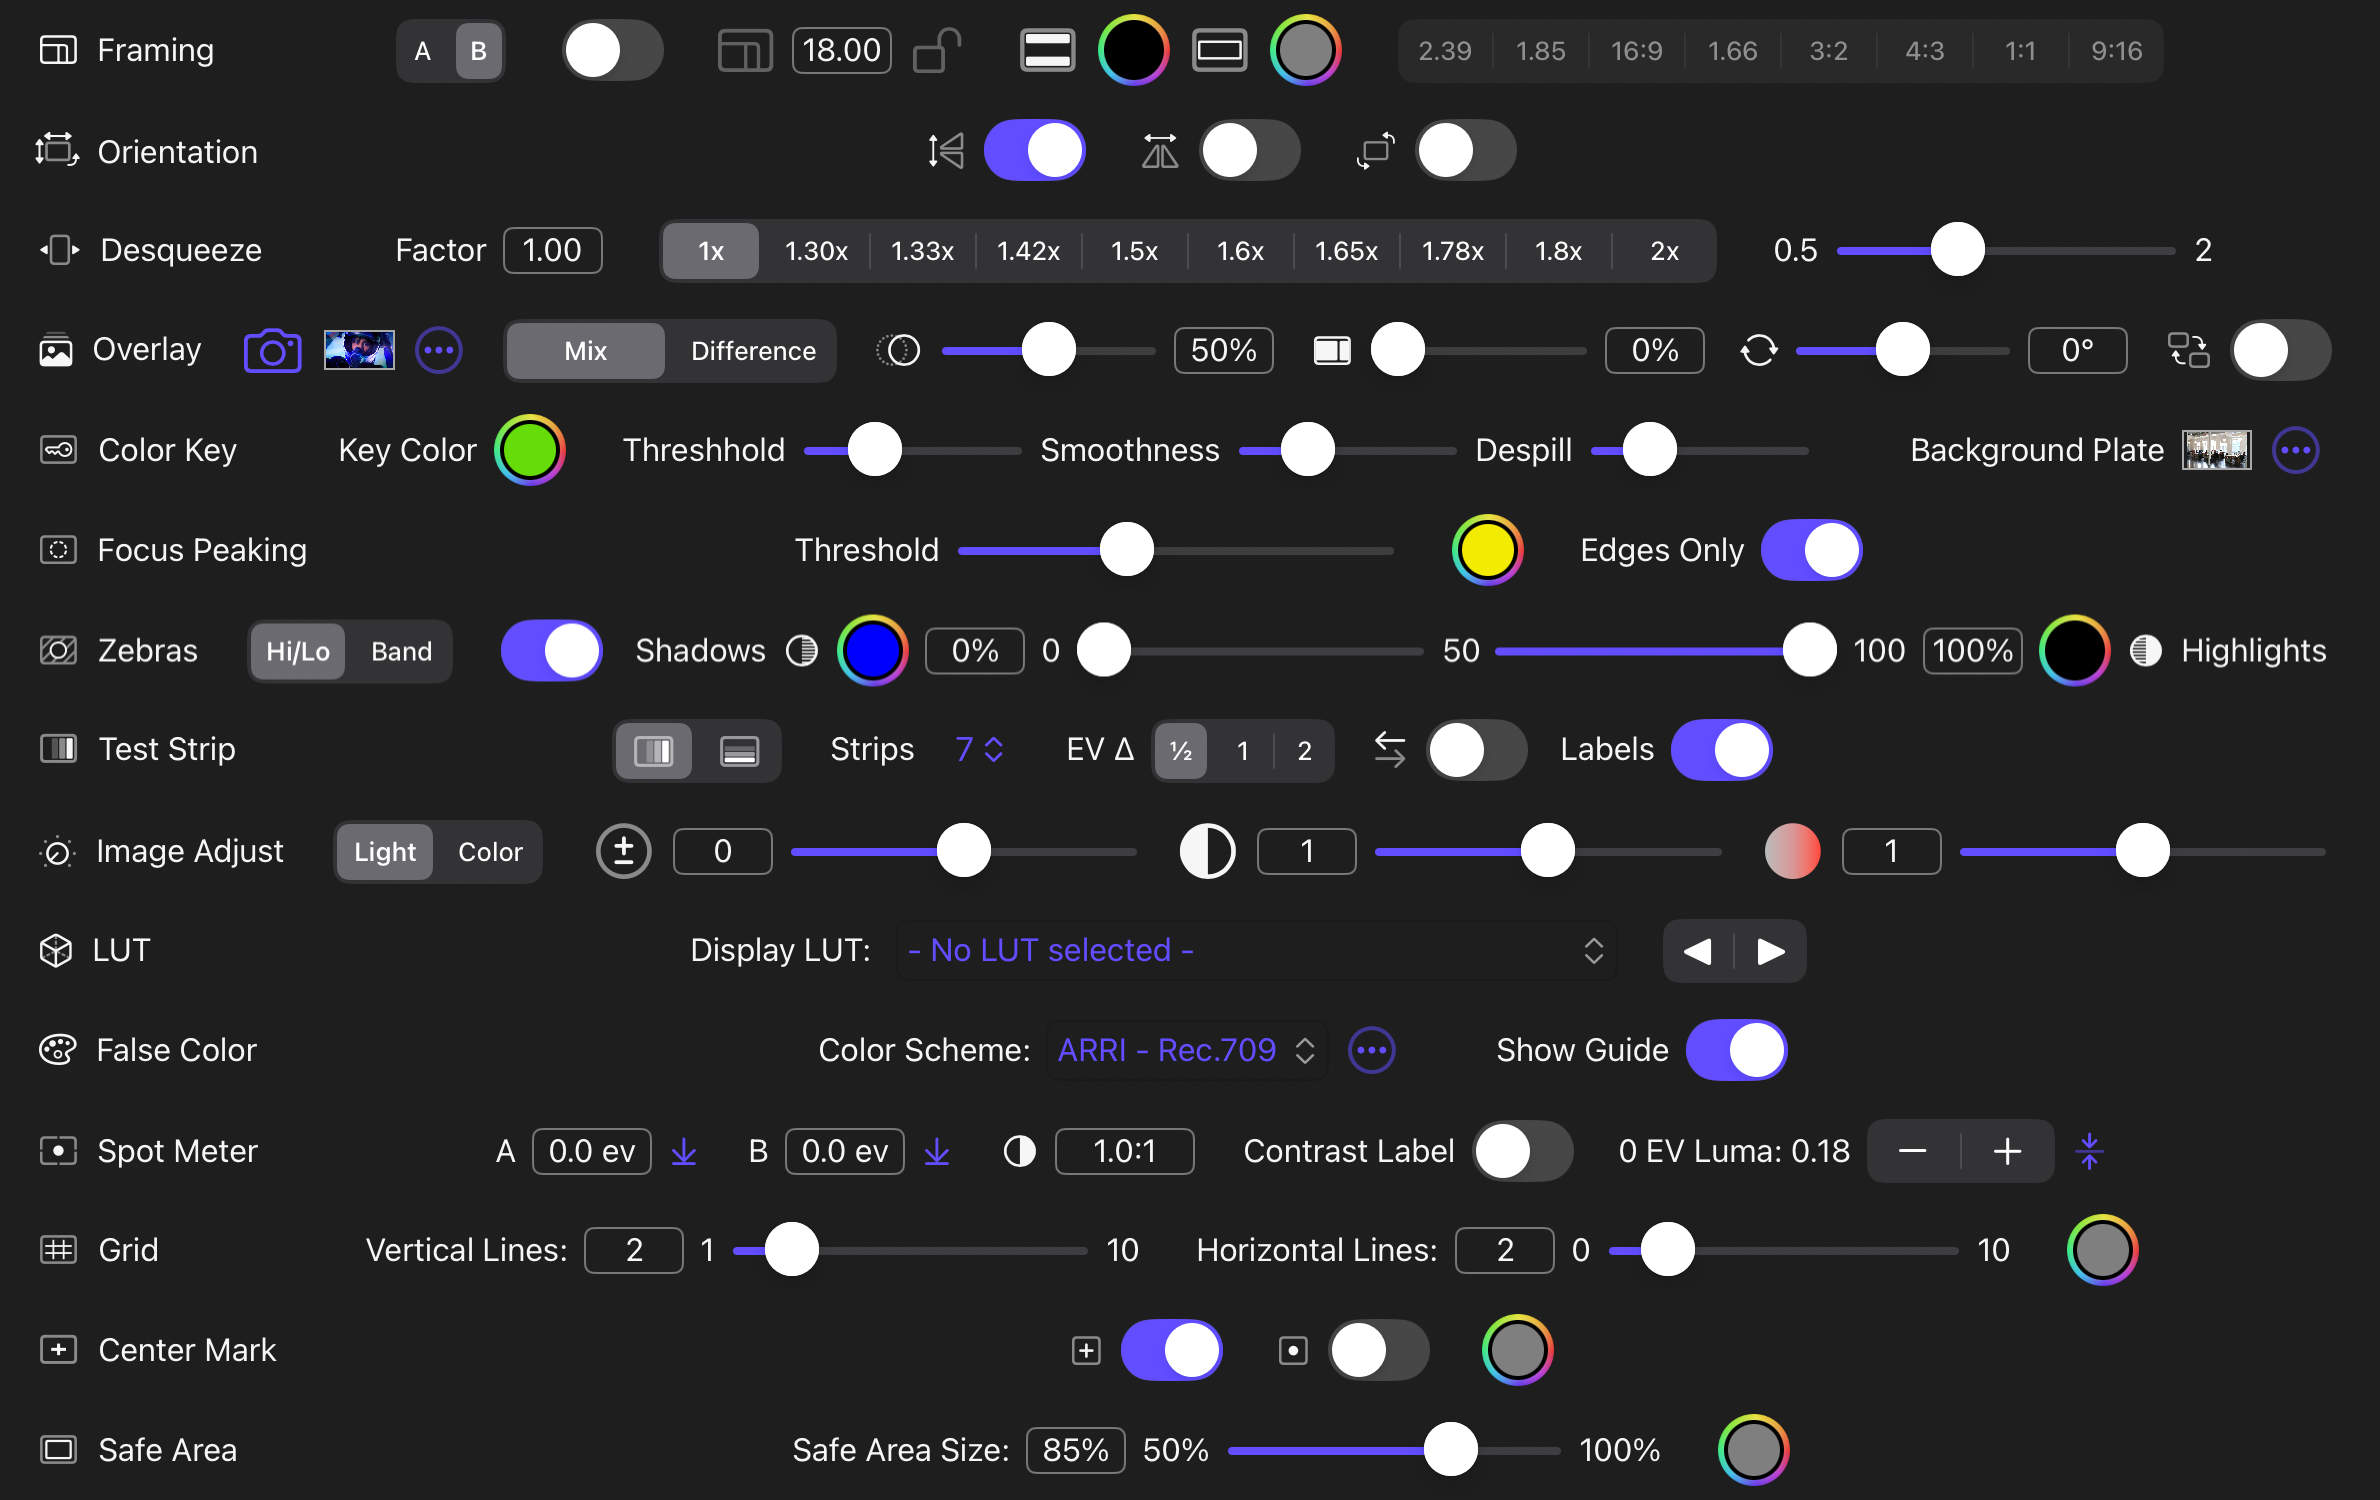
| Video Assist Tools | Center | You can have multiple video assist tools active at the same time. Every tool has additional configuration options that are hidden by default. Tap/Click a tool button to turn it on/off. iPad swipe up/down (or long-press) Mac click the options arrow of any video assist tool to reveal its corresponding tool options drawer. Repeat the action again to hide it. Multiple option drawers can be open at once. |
| Zoom Control | Right | Adjust the magnification level of the image. |
Status Toolbar
| Region | Location | Purpose |
|---|---|---|
| Sources Panel | Left | Use this popover to switch between video sources. Use the power button ⏻ to turn a source on or off. The active source will have a green power button. Turning off the active source will take you back to the Home Screen on the Main Display Area. |
| Playback Transport Controls | Center | Playback transport controls will appear here when in playback mode. Transport controls include a play/pause button, fast forward/rewind buttons (tap/click multiple times to change playback speed), and a progress/scrub bar. |
| Scopes & Layout | Right | Toggle the visibility of the floating Histogram, Waveform Monitor, and Vectorscope in single view layout. Use the Display Layout menu to switch between single, 2x1 (side-by-side), and 2x2 (grid) views. |
Tool Option Drawers

iPad Swipe up/down (or long-press) Mac click the options arrow of any video assist tool icon to reveal its corresponding tool options drawer. Repeat the action again to hide it.
If you open multiple drawers they stack neatly on top of each other.
Additional Notes
- Real-time Updates – Change a slider and watch the monitor viewer respond instantly.
- Restore to Default – Double-tap/-click a control’s label or text field to reset it to its default value.
- Persistent per Preset – Drawer state (open/closed) and all its control values are saved with the active preset.
For detailed information on drawer options for each tool visit the Tools Reference Section
Sidebar
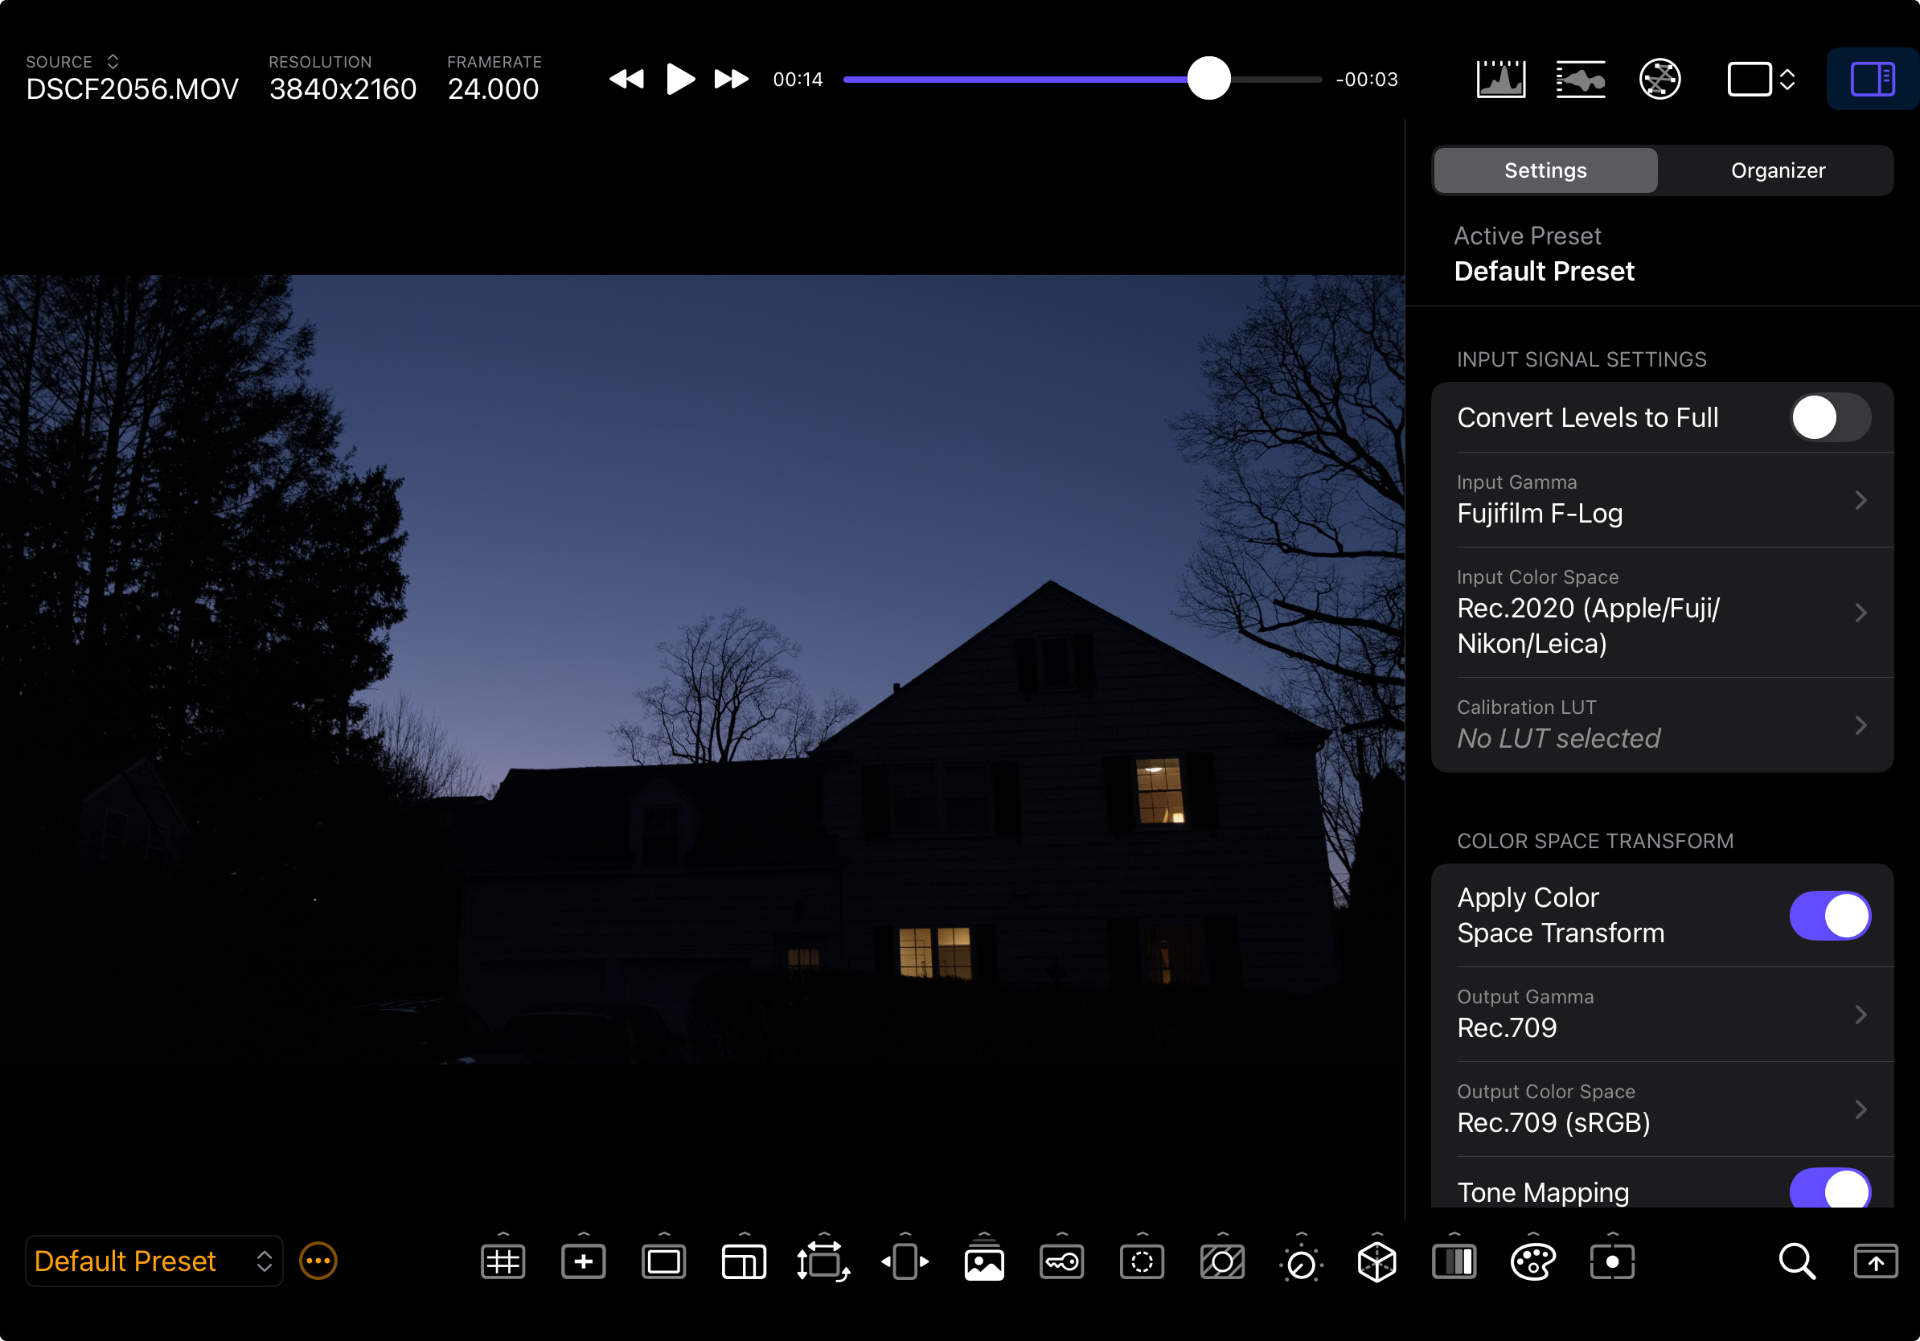
Tap/Click the Sidebar Button on the top toolbar to open the Sidebar. It contains two main sections:
- Settings – Per-preset settings that control the image processing pipeline and other tool functions. See Presets for more information about preset settings.
- Organizer – Manage Configuration Presets, Display LUTs, and False-Color Gradients. See Organizer for more detailed information.
Gestures
Many gestures have already been mentioned in previous sections, but are summarized here for reference:
| Target | Gesture | Action |
|---|---|---|
| Viewer | Double‑tap/-click | Hide/show the toolbars |
| Long-press | Show viewer selection context menu | |
| Pinch‑zoom | Zoom/Magnify the image | |
| Drag | Navigate the magnified image | |
| Horizontal-swipe, single-finger PRO | Cycle though configuration presets | |
| Mini-map red rectangle | Drag | Navigate the magnified image |
| Scope Viewer | Double-tap/-click | Show scope options bar |
| Floating Scope Window | Double-tap/-click | Show scope options bar |
| Pinch-zoom | Resize the floating window | |
| Drag | Reposition the floating window | |
| Assist Toolbar Button | Long-press/swipe vertical | Show tool options drawer |
Keyboard Shortcuts
On Mac (and iPad OS 26+) the following keyboard shortcuts are available:
| Shortcut | Action |
|---|---|
⌘/ | Show/Hide toolbars |
⌥/ | Swap toolbars |
⌥⇧H | Hide all tool options drawers |
⌥<letter> | Show/Hide tool options drawer |
⌘0 | Reset zoom |
⌘+ | Zoom in |
⌘- | Zoom out |
⌘ˆI | Toggle sidebar visibility |
ˆ<letter> | Toggle tool |
⌘1 | Single viewer layout |
⌘2 | 2x1 grid layout |
⌘1 | 2x2 grid layout |
Space | Play/Pause playback |
J | Increase backward shuttle speed (1×/2×/4×/8×) |
K | Pause playback |
L | Increase forward shuttle speed (1×/2×/4×/8×) |